Setting Up Email With SmarterMail Webmail
Log into your webmail with your email address and password. Once you are logged in click on the gear icon to go into your settings.

On the left side of the screen click on the section that says "Signatures" to add or edit your signatures.

To add a new signature click on "New Signature" and to edit an existing signature click on the signature you wish to modify.

There are two parts to your signature. Once you are done adding/editing your signature click on the "Save" button.
- Name: This is where you will enter in a descriptive name for your signature. This name is used for choosing defaults for your email address.
- Signature Box: Enter in your signature as you want. Here you can bold, Italicize, and Underline. If you click the + in the title area you can choose to add bulleted lists, numbered lists, images, and more.

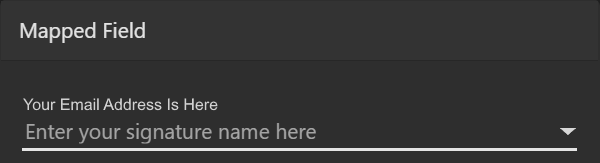
To the right you will see a section with a heading of "Mapped Field." In this area you will see your email address(es) that are assigned to your account. Click the drop down arrow and choose the email address you wish to use for that email address.
To save all the changes click the "Save" button at the top of the screen. With everything saved you ccan click the Email icon (top left) to get back into your email. When you click on New Message, Replying, or Forwarding the signature you chose will appear.

Knowledge Base Article Categories
Choose from the Knowledge Base category to view the available articles.